Archive for year: 2026

Radon Mitigation System Cost Canada | Find the Best Approach

Radon Mitigation System Cost Canada: Why Every Home Is Different

The radon mitigation system cost Canada homeowners may face depends on their property’s foundation, the mitigation method selected and the work required for installation. A finished basement, a concrete slab and a crawl space can each present different challenges. If testing reveals elevated radon levels, understanding these differences can help you evaluate your options, compare estimates and plan the next steps. Rather than relying on a standard price, consider what your home requires and what an installation estimate actually includes.
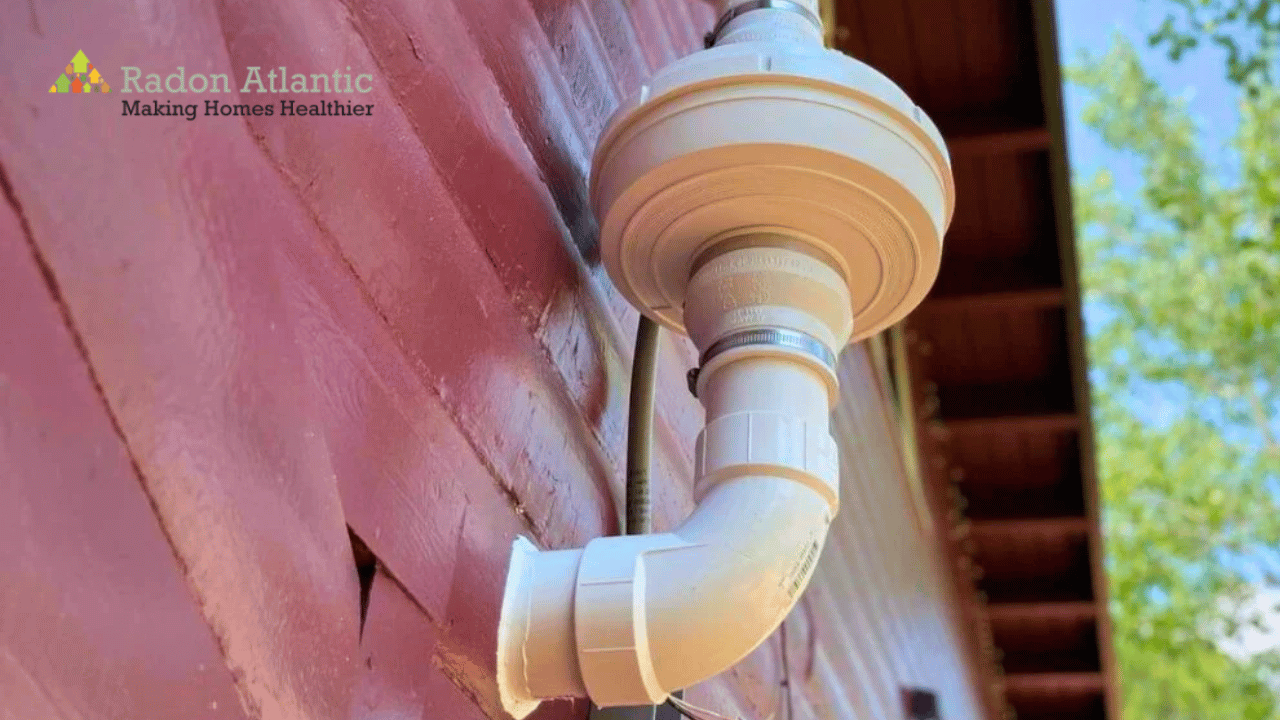
Radon Mitigation System Cost Canada – Understanding Installation Costs and Radon Reduction Solutions for Canadian Homes.

What Determines Your Radon Mitigation Estimate?

Two homes in the same neighbourhood may need different mitigation plans. Foundation construction, equipment placement, access to installation areas and the proposed system design can all influence the scope of work.

When reviewing an estimate, consider these factors:

Foundation type: Basements, concrete slabs and crawl spaces can require different installation approaches.

System design: Equipment selection, suction point placement and vent pipe routing affect the work involved.

Accessibility: Finished walls, limited working space and existing utilities may complicate installation.

Additional work: Sealing certain openings or addressing specific foundation conditions may affect the estimate.

Follow-up testing: Check whether post-installation measurements are included or arranged separately.

A clear estimate should explain the proposed work and identify any exclusions. This allows you to compare the actual scope of different proposals instead of choosing solely on the quoted total.

Three Homes, Three Different Mitigation Estimates

Consider three homeowners who discover elevated radon levels. Their situations demonstrate why an assessment should account for the individual property rather than assume every installation will be the same.

Scenario 1: The Home With a Finished Basement

A homeowner has recently renovated the basement, adding drywall, flooring and a finished living area. After testing reveals elevated radon levels, they begin exploring mitigation options.

The existing layout may affect equipment placement and pipe routing. Depending on accessibility, additional work may be needed to accommodate the system without unnecessarily disturbing the finished space.

What to ask: How will the proposed system fit into the existing layout, and are any modifications to the finished basement expected?

Scenario 2: The Home Built on a Concrete Slab

Another homeowner has a house built on a concrete slab rather than a full basement. The mitigation plan may need to account for the slab’s construction, conditions beneath it and suitable locations for system components.

The installation approach should reflect these characteristics instead of simply copying a design used in another property.

What to ask: Which mitigation method is recommended for this foundation, and what installation work is included in the estimate?

Scenario 3: The Home With a Crawl Space

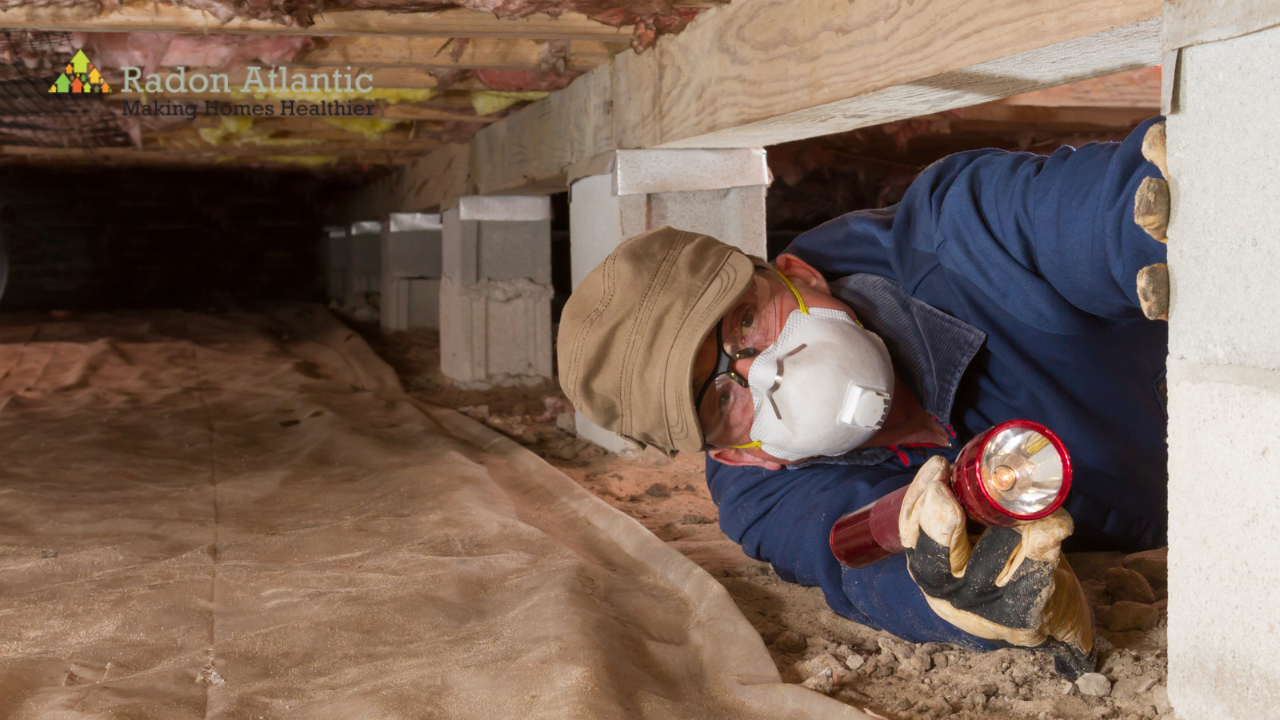
A third homeowner discovers elevated radon levels in a property with a crawl space. The assessment may need to consider accessibility, ground covering and potential pathways through which radon enters the home.

These conditions can influence the design and scope of the proposed work.

What to ask: How will the crawl space be addressed, and how will the results be checked after installation?

These examples illustrate why the radon mitigation system cost Canada homeowners receive in an estimate should reflect their property’s actual requirements. The foundation alone does not determine the price; the complete installation plan matters.

How Can You Compare Radon Mitigation Quotes?

A lower quote may cover a different scope of work than a higher one. Before making a decision, ask each provider:

  • Which equipment, labour and installation tasks are included?
  • Are additional repairs or modifications charged separately?
  • Why is the proposed mitigation method suitable for the property?
  • Is post-installation radon testing included?
  • What maintenance or follow-up checks may be required?

Keep the answers with each estimate so you can compare the proposed solutions fairly. Understanding what is included also helps you identify questions that need clarification before approving the work.

Which Mitigation Method May Suit Your Home?

Radon Atlantic provides radon assessment and mitigation services to help homeowners understand their radon levels and explore suitable mitigation options. 

Its mitigation services include active soil depressurization (ASD) and heat recovery ventilation (HRV) systems. ASD draws radon from beneath a building’s foundation and vents it outdoors. HRV systems exchange indoor and outdoor air while recovering heat. Their suitability for radon mitigation depends on the property’s conditions and the recommended approach. 

The right approach depends on the property’s conditions and assessment findings. Radon Atlantic can help homeowners understand the available options and the work involved in addressing elevated radon levels.

Get an Estimate for Your Property

Mitigation costs depend on the installation requirements, not simply the equipment. Understanding your test results, foundation type and proposed system can help you make a more informed decision about radon mitigation system cost Canada.

If your home has elevated radon levels, contact Radon Atlantic to discuss your property’s requirements and request an estimate. Explore suitable mitigation options, clarify installation requirements, and ask about post-installation testing before deciding on your next step.
Radon in Crawl Space Homes | Find Risks & Mitigation Options

Radon in Crawl Space Homes: 6 Hidden Entry Points to Check

What lies beneath your floors could affect the air inside your home. Radon in crawl space homes is a concern because this naturally occurring radioactive gas can move from the soil through foundation openings and reach occupied rooms. Because radon has no smell, colour, or taste, a visual inspection cannot establish whether your home’s indoor radon concentration is elevated. 

Radon in crawl space homes and radon mitigation solutions to improve indoor air quality.

Understanding these six potential entry conditions is a useful starting point, but testing is necessary to determine the level in your living space and whether mitigation may be needed.

1. Exposed Earth Beneath the House

An uncovered earth floor leaves the crawl space directly connected to the soil below. As uranium in soil and rock breaks down, radon forms and can move through the ground into enclosed spaces.

An exposed earth floor does not automatically mean your home has elevated radon levels. However, it is worth considering how soil gas could enter the building.

What you can do: Arrange a radon test in the lowest normally occupied area of your home, following the applicable testing instructions. If the result is elevated, a professional assessment can help determine whether crawl space mitigation is appropriate. 

2. Cracks in Foundation Walls

Foundation walls separate the crawl space from the surrounding ground, but cracks and openings can provide routes for radon to enter. Their significance depends on the building’s construction and the pathways available for soil gas movement.

Visible cracks deserve attention during general home maintenance, but their size or appearance cannot tell you whether radon levels are elevated.

What you can do: Address foundation damage as part of routine home maintenance, but do not assume that sealing visible cracks will resolve a radon concern. Review your test results with a qualified radon mitigation professional to determine whether additional measures are needed. 

3. Gaps Around Pipes and Support Posts

Plumbing lines, utility penetrations, and support posts can leave small gaps where they pass through floors or other building components. These openings may connect the crawl space with other parts of the home.

Because these gaps are not always easy to spot, checking only the most visible parts of the foundation may overlook potential entry points.

What you can do: Have gaps around pipes and support posts considered during a radon assessment. Sealing suitable openings may help limit entry, but the need for a broader mitigation system depends on the measured radon concentration and the home’s construction. 

4.Unsealed Construction Seams and Floor Openings

Construction seams, joints, and openings between materials can provide additional routes for soil gas. In some properties, radon entering the crawl space may move through these openings into the rooms above.

A floor that looks intact does not necessarily prevent soil gas from entering the living space. In radon in crawl space homes, multiple pathways may connect the crawl space to occupied rooms, making it important to consider the building as a whole rather than focusing on a single opening. 

What you can do: Arrange testing in the appropriate occupied area of your home. If the results are elevated, a professional assessment can help identify potential entry routes and determine which mitigation measures may be suitable.

5. Crawl Space Drains and Sump Holes

Drains and sump holes can create connections between the building and the surrounding ground. Depending on their construction, these openings may allow radon to enter indoor spaces.

Their presence alone does not confirm a radon problem, but they should not be overlooked when considering the property’s foundation and possible entry routes.

What you can do: Have drains and sump openings evaluated alongside other potential entry points. Because these features may serve an important drainage function, any sealing or modification should account for their purpose and the property’s radon mitigation requirements. 

6. Air Pressure Differences Inside the Home

Radon movement depends on more than visible cracks. Differences in air pressure between the soil, crawl space, and occupied areas can influence how soil gas moves through a building.

Heating and ventilation conditions can affect these pressure relationships. Consequently, sealing a few visible openings may not be enough to address elevated radon levels.

What you can do: Avoid relying on ventilation changes or sealing alone to address elevated radon levels. Active soil depressurization (ASD) draws soil gas away from the building and vents it outdoors. The appropriate system should be selected according to the home’s construction and measured radon levels. 

How Can You Address Radon in a Crawl Space Home?

Identifying potential entry points is useful, but testing is necessary to establish the radon concentration in your home. Results from the appropriate living area help determine whether mitigation is recommended.

Follow these three steps:

  1. Arrange a long-term test. Health Canada recommends testing for at least three months, ideally during the fall or winter. Place the detector in the lowest normally occupied area where someone spends more than four hours a day, following the device instructions. An unfinished crawl space is not the standard testing location for assessing exposure in living areas.
  2. Review your results. Canada’s guideline is 200 Bq/m³. If the average concentration from a test lasting at least 91 days exceeds 200 Bq/m³, corrective action is recommended. The higher the radon concentration, the sooner action should be taken. 
  3. Explore appropriate mitigation. We offer Active Soil Depressurization (ASD) and Heat Recovery Ventilation (HRV) systems to help reduce indoor radon levels. ASD is generally more effective for radon reduction, while HRV may be suitable when a smaller reduction is needed. The right approach depends on your home’s construction and measured radon levels. 

Accurate testing and a property-specific assessment help you make informed decisions based on measured levels rather than assumptions.

Get Expert Guidance From Radon Atlantic

Radon in crawl space homes requires accurate testing to understand potential risks and determine whether mitigation is needed. We provide radon analysis, risk assessment, and mitigation services to help you explore suitable solutions for your property.

Concerned about radon beneath your home? Contact us today to discuss your results and mitigation options.

Radon Mitigation System Maintenance | System Performance

Radon Mitigation System Maintenance: Testing, Care, and Repairs 

Once a radon mitigation system is installed, it is easy to assume the job is done. But fans can wear out, pipes can become damaged, and radon levels can change over time. Radon mitigation system maintenance helps homeowners keep an eye on these changes and recognize when the system needs attention. Knowing what to check, when to test, and when to call a professional can make it easier to look after your home’s radon mitigation system.

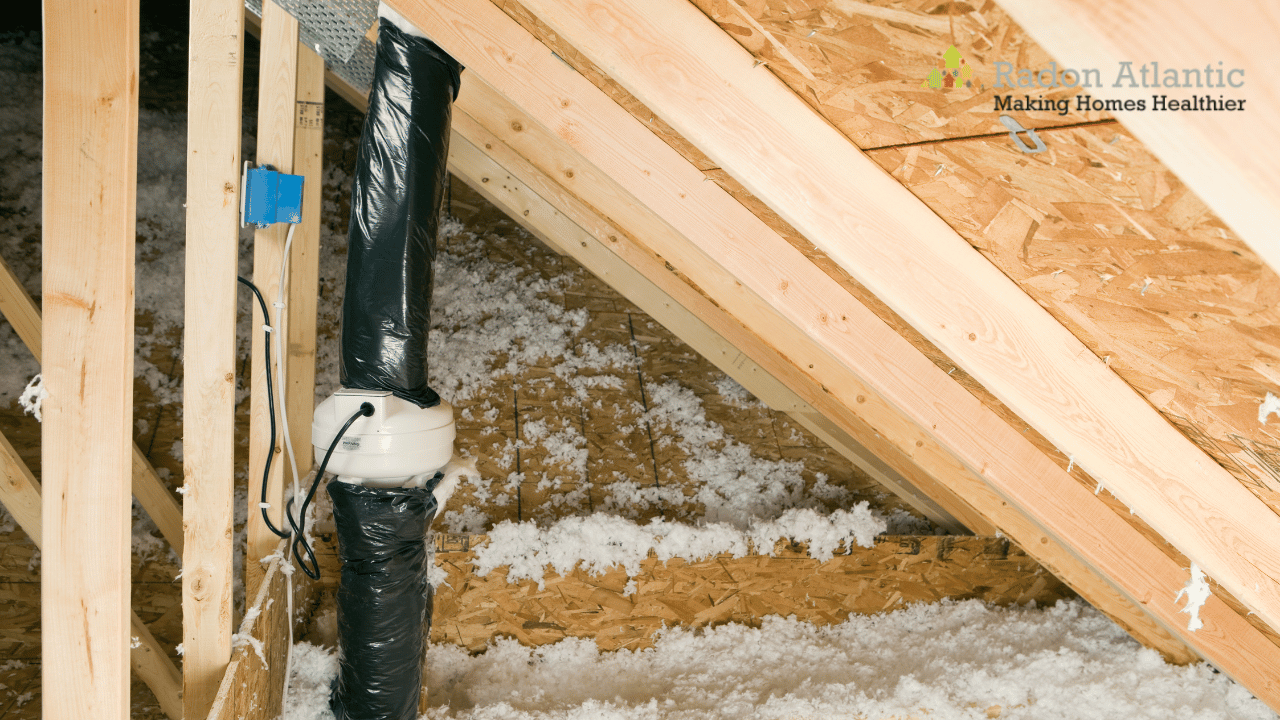
Radon mitigation system maintenance and inspection to ensure proper ventilation and safe indoor air quality.

What Tells You If Your System Is Working?

Two things are worth paying attention to: the condition of the equipment and the amount of radon in your home. Checking the system can help you notice potential equipment problems, while testing provides information about indoor radon concentrations.

1. Start With the Equipment

Most active radon mitigation systems use a fan to draw soil gas from beneath the foundation and direct it outdoors through a vent pipe. The fan generally operates continuously, so changes in its operation are worth noticing.

Listen for unusual rattling or grinding sounds. If the fan stops running or you notice visible damage to the piping, arrange an assessment by a qualified professional. A problem with one component does not automatically mean the entire system needs replacing.

2.Check Your Radon Test Results

A system that appears to be operating normally does not necessarily mean indoor radon levels remain low. Follow-up testing helps homeowners understand the radon concentration inside their homes and identify changes that may need attention.

Testing after installation provides information about how well the system has reduced radon levels. Health Canada recommends testing a home for at least three months, ideally during the fall and winter, to obtain a more representative picture of indoor radon levels. Retesting may also be appropriate after significant renovations or repairs that affect the home’s structure or ventilation.

Why Might Your System Need Attention?

A radon mitigation system can develop problems as its components age. Changes around the house can also affect how it operates.

Here are a few things that may call for a closer look:

A worn or faulty fan: Mechanical problems or a power interruption can stop the fan from operating as intended.

Pipes and connections: Visible damage to piping or connections may need professional inspection and repair.

Renovations: Foundation work, basement remodelling, or other structural changes may affect radon entry conditions or the existing system.

Higher radon readings: An unexpected test result deserves attention, even if the equipment appears to be running normally.

The next step depends on what has changed. A faulty fan may need repair or replacement, while an unexpected test result may call for a closer look at the system and the building itself.

What Can You Check Between Service Visits?

You can keep track of several things without taking the system apart. A few minutes spent checking accessible components can help you notice potential problems.

Fan: Listen for unfamiliar sounds and notice if it stops running.

Visible piping: Look for obvious damage to accessible sections of the pipework.

Test records: Keep previous radon results so you can compare them with new measurements.

Leave electrical work, fan repairs, and technical adjustments to a qualified professional. Regular radon mitigation system maintenance can help you identify visible equipment issues and recognize when professional attention may be needed. Ask about the maintenance requirements for your particular system and whether follow-up testing is recommended.

When Should You Call a Professional?

Sometimes the next step is clear. Other times, a change in the system needs a closer look before you know what is wrong.

What you noticeWhat to do
The fan has stoppedArrange an assessment of the fan and its power supply.
You notice a change in system operationContact a qualified professional for advice.
A pipe or connection looks damagedArrange an inspection and any necessary repairs.
A radon test shows a higher readingDiscuss the result with a qualified radon professional.
You have made major changes to the basement or foundationAsk whether the system needs an assessment or the home needs retesting.

In Canada, the guideline for indoor radon is 200 becquerels per cubic metre (Bq/m³). Health Canada recommends taking action to reduce radon when the average annual concentration in an occupied area exceeds this level. A qualified radon professional can help you understand your test results and discuss appropriate next steps.

Keep Records of Tests, Repairs, and Changes

Keeping service records and radon test results in one place makes it easier to track your system over time. Note when a fan is repaired, when a component is replaced, and when a new test is completed. If a problem develops later, this history may help a technician understand what has happened.

Before agreeing to repair work, ask what the inspection found, which parts need attention, and whether another radon test is recommended afterwards. This gives you a clearer idea of the work involved and how the results will be assessed.

Need Help With Your Radon Mitigation System?

If your fan has stopped, you notice unusual equipment sounds, or a recent radon test has raised concerns, it is worth finding out why. Radon mitigation system maintenance can help you recognize potential equipment issues and understand when professional assessment may be needed.

Radon Atlantic offers radon analysis, risk assessment, and mitigation services for homeowners with radon-related concerns. Contact our team to discuss your home’s needs and explore the available options.

Residential Ventilation Contractors | Improve Home Airflow

7 Signs You Need Residential Ventilation Contractors for Your Home 

Most homeowners don’t think about ventilation until something feels off. Maybe your windows fog up every morning, certain rooms always feel stuffy, or you can’t seem to get rid of that musty smell. These may seem like small inconveniences, but they can point to poor indoor airflow. At Radon Atlantic, we often speak with homeowners who are surprised to learn that these everyday issues may be connected. Knowing when to contact residential ventilation contractors can help you understand what’s affecting your home’s airflow and explore practical solutions before minor concerns become ongoing issues. 

Residential ventilation contractors providing home ventilation solutions

Sign #1: Your Windows Frequently Have Condensation

Do your windows fog up every morning or collect moisture during colder months?

While occasional condensation can be normal, persistent moisture on windows often indicates that humid indoor air isn’t being removed effectively. Everyday activities such as cooking, showering, and laundry all release moisture into the home. Without adequate airflow, that moisture can remain trapped indoors.

If left unchecked, excess condensation can contribute to damp window frames and create conditions where mould may develop.

Sign #2: Cooking Smells and Musty Odours Linger for Hours

You clean your kitchen, open a window, or use an air freshener, but the smell still seems to stay around. When odours from cooking, pets, or everyday activities linger longer than expected, it may be a sign that stale indoor air isn’t being replaced effectively.

Good ventilation helps remove trapped air and allows fresh air to circulate throughout your home. Instead of simply masking unwanted smells, improving airflow addresses one of the reasons those odours continue to build up.

Sign #3: You Keep Finding Mould in the Same Areas

Cleaning mould only to have it reappear can be frustrating.

Recurring mould may be related to excess indoor moisture, although other factors can also contribute. Bathrooms, basements, laundry rooms, and areas around windows are especially prone to moisture buildup when ventilation is inadequate.

Identifying and managing sources of excess humidity can help address conditions that may contribute to recurring mould concerns.

Sign #4: Some Rooms Always Feel Stuffy

Does one bedroom feel warmer than the rest of the house? Does your upstairs seem uncomfortable while other areas feel fine?

Uneven airflow can leave certain rooms feeling stuffy or poorly ventilated. This doesn’t just affect comfort—it may also indicate that fresh air isn’t circulating effectively throughout the home.

If these issues persist regardless of the season, it may be worth having your ventilation system evaluated. Residential ventilation contractors can assess airflow patterns and identify areas where your home may need improved ventilation. Poor air distribution can make some areas of your home feel uncomfortable even when your heating or cooling system is working properly. 

Sign #5: Your Home Feels Humid Throughout the Year

Indoor humidity can become a year-round concern, especially in homes that are well insulated and tightly sealed.

A balanced ventilation approach, such as heat recovery ventilation, can help address these challenges in many modern homes. This type of system helps remove stale, humid indoor air while bringing in fresh outdoor air, improving airflow without unnecessarily losing heat. It can support better indoor comfort while helping maintain healthier humidity levels.

Sign #6: Indoor Air Feels Less Comfortable Than It Used To 

Do you notice that indoor air feels less comfortable or that your home seems harder to keep fresh? 

Dust, pet dander, and other airborne particles can accumulate when fresh air exchange is limited. While ventilation isn’t a substitute for medical treatment, improving indoor airflow can help support a fresher and more comfortable indoor environment. 

If multiple members of your household notice that indoor air feels uncomfortable, your home’s ventilation may be worth investigating. 

Sign #7: You’ve Recently Upgraded Your Home

Installing new windows, adding insulation, or completing a renovation can make your home more energy efficient—but it can also reduce natural airflow.

As homes become more airtight, mechanical ventilation often becomes increasingly important. An HRV ventilation system helps balance indoor and outdoor air exchange by removing stale air while introducing filtered fresh air, making it a practical option for many modern homes.

What Should You Do If You Notice These Signs?

Experiencing one of these issues occasionally may not indicate a significant problem. However, if several of these signs occur regularly, it’s a good idea to have your home’s ventilation assessed.

Working with experienced residential ventilation contractors can help homeowners evaluate airflow, identify moisture concerns, and understand which solutions may suit their home’s layout and ventilation requirements.

Improve Your Home’s Ventilation With Expert Guidance 

Ignoring ongoing ventilation issues can lead to discomfort, excess humidity, and declining indoor air quality over time. Recognizing the warning signs early allows you to explore solutions before they become larger concerns.

At Radon Atlantic, we help homeowners assess ventilation concerns and explore practical solutions designed around their property’s needs. If you’ve noticed recurring humidity, stale air, or airflow issues, our team can help you better understand the next steps toward improving your home’s comfort.

Nova Scotia Radon Map: Red & Green Flags | Radon Atlantic

Nova Scotia Radon Map: Red Flags vs. Green Flags for Homeowners

You check the map, find your community, and see a lower-risk category. Does that mean you can cross radon testing off your list? Not necessarily. The Nova Scotia radon map is useful for understanding regional radon potential, but it cannot tell you the radon concentration inside your individual home. Knowing how to interpret the information can help you decide what to do next.
Nova Scotia radon map showing radon risk areas

? Red Flag: Assuming a Lower-Risk Area Means Low Radon

A lower-risk area may seem reassuring, but it does not guarantee that every home in that area has a low radon concentration.

Nova Scotia’s radon data shows that elevated readings can occur across different mapped risk categories. In other words, geographic information can indicate potential, but individual homes can still produce different test results.

? Green Flag: Use the Map for Context

Think of the map as a starting point rather than a test result.

It can help you understand the broader conditions around your community and why radon testing may be worth considering. The actual concentration inside your home can only be determined through appropriate testing.

? Red Flag: Comparing Your Home With Your Neighbour’s

A neighbour’s radon result may seem like a useful reference, particularly when the homes are close together.

However, properties can differ in foundation design, soil conditions, openings around pipes and utility services, ventilation, and other characteristics that influence how radon enters and accumulates indoors.

? Green Flag: Pay Attention to Your Own Test Result

The most relevant measurement is the one taken inside your property.

Long-term radon testing for at least three months can provide a more representative picture of typical indoor radon exposure, since concentrations can vary over time. 

? Red Flag: Treating the Map Like an Individual Reading

A map can show where radon potential may be greater across a region. It cannot tell you whether your home has 50 Bq/m³, 200 Bq/m³, or a substantially higher concentration.

This distinction is important when interpreting any regional radon information.

? Green Flag: Turn Regional Information Into a Measurement

The Nova Scotia radon map can provide useful background information. A radon test provides property-specific information.

That makes testing the logical next step for homeowners who want to know what is actually happening inside their home rather than relying on a regional estimate.

The Number That Matters

Radon is measured in becquerels per cubic metre (Bq/m³). The Canadian guideline for indoor radon is 200 Bq/m³. When the annual average concentration is above this level, action to reduce radon exposure is recommended. 

The important point is that the number comes from testing—not from the colour or category shown on a regional map.

? Red Flag: Looking for Visible Signs of Radon

Radon is different from many household problems because there may be nothing obvious to see, smell, or taste.

A clean, well-maintained basement does not necessarily indicate a low radon concentration. Likewise, visible foundation issues do not provide a reliable measurement of indoor radon.

? Green Flag: Make Testing Part of Home Maintenance

Testing can give homeowners information that cannot be obtained through a visual inspection.

For a long-term test, the detector should generally be placed in the lowest lived-in level of the home where someone spends more than four hours per day. Following the manufacturer’s instructions is also important for obtaining a useful result.

? Red Flag: Assuming an Elevated Result Has No Practical Solution

Receiving an elevated result can raise questions about what happens next. It does not mean that homeowners are out of options.

Radon levels can often be reduced through mitigation measures selected according to the building and how radon is entering it.

? Green Flag: Get the Property Assessed

If testing identifies elevated radon, the next step is to understand the appropriate mitigation options for the specific property.

Potential approaches can include active soil depressurization and other measures intended to reduce radon entry or concentration. The right approach depends on factors such as the home’s foundation and construction.

From Map to Action

The Nova Scotia radon map is most useful when viewed as one part of a larger process:

Check the map ? Understand the regional potential ? Test your home ? Review the result ? Consider appropriate action

That approach avoids two common mistakes: assuming that a higher-risk area automatically means your home has elevated radon, or assuming that a lower-risk area means testing is unnecessary.

For homeowners who want help understanding radon testing or what to consider after receiving an elevated result, Radon Atlantic can provide information about testing and mitigation services available for properties in Nova Scotia.

Radon In Nova Scotia | Building A New Home | Radon Atlantic

Building A New Home? What You Should Know About Radon In Nova Scotia 

Building a home from the ground up gives you the opportunity to address important details before they become difficult or expensive to change. That includes planning for radon in Nova Scotia, particularly when the foundation and below-slab components are still being planned. Rather than treating radon as something to consider after construction, homeowners can discuss radon-resistant measures with their builder before work begins.
Radon in Nova Scotia and home radon testing

Why Address Radon During New Construction?

A newly built home is not automatically protected from radon. Radon comes from uranium naturally present in soil and rock, so its presence is not determined simply by the age of a property. Even newer homes can have elevated indoor radon levels.

The advantage of new construction is that protective measures can be incorporated while the foundation is being built. Health Canada recommends passive soil depressurization systems for new homes because they can help manage soil gas before it enters the living space. These systems can also be upgraded with a fan if additional reduction is needed after testing.

What Makes A Home Radon-Ready?

A radon-ready approach involves more than installing a single pipe. The foundation and soil beneath the home need to be considered as part of a system designed to manage soil gas.

Depending on the construction method and home design, measures may include:

  • A gas-permeable layer beneath the concrete slab
  • A soil gas barrier or membrane
  • Sealing around foundation openings, joints and penetrations
  • A pipe extending from beneath the foundation to the exterior
  • Appropriate placement of the system termination
  • Provisions for converting a passive system to an active system

These details should be considered during the planning and foundation stages, when they can be incorporated into the construction process more easily.

What Should You Discuss With Your Builder?

Radon protection should be part of the building conversation before the foundation is finished. Homeowners can ask questions such as:

  • What radon-resistant measures are included in the design?
  • How will soil gas be managed beneath the foundation?
  • Where will the radon system pipe be located?
  • How will openings and penetrations be sealed?
  • Can the system be activated later if testing shows higher levels?
  • Who will oversee the radon-related installation?
  • What information will be provided about the completed system?

Discussing these points early gives the builder, designer and radon professional an opportunity to coordinate the work with the rest of the home’s foundation and mechanical systems.

Does Radon-Resistant Construction Eliminate The Need For Testing? 

No. Radon-resistant construction is designed to reduce the potential for radon entry, but it does not establish the actual radon concentration inside a completed home.

That is why testing remains important. Health Canada recommends long-term testing in new homes, with a test lasting at least 91 days during the heating season. A long-term test can provide a more useful picture of the home’s indoor radon level over an extended period.

Testing is also important for understanding radon in Nova Scotia homes because two properties in the same area can have different radon levels based on soil conditions, foundation characteristics and building features. 

Why Testing Still Matters After Construction

Once construction is complete and the home is occupied, testing can show whether the measures incorporated into the building are achieving the intended result.

Health Canada recommends taking action when a long-term test shows a radon concentration above the Canadian guideline of 200 Bq/m³. If further reduction is needed, a passive system incorporated during construction may provide a starting point for conversion to an active system.

This makes the process straightforward: construction measures help address potential radon entry, while testing tells homeowners what is actually happening inside the finished property.

Plan Before The Foundation Is Finished

For homeowners building in Nova Scotia, understanding radon in Nova Scotia before construction begins can help them discuss radon-resistant measures with their builder. 

After construction, a long-term test can provide the property-specific information needed to determine whether additional action is appropriate. Planning ahead puts the right questions on the table before the foundation is complete.

Radon Contractors Halifax | 6 Mistakes Property Owners Make

6 Mistakes to Avoid When Hiring Radon Contractors Halifax 

Radon is easy to overlook because there is nothing obvious to alert you when it is present. The gas is invisible and odourless, so testing is the practical way to determine whether radon is present and measure its level inside a property. Whether you are arranging your first test or considering mitigation, knowing what to avoid can help you make more informed decisions when working with radon contractors Halifax. 

Radon contractors Halifax

1. Assuming You Would Know If Radon Were Present

One common misconception about radon is that its presence will produce an obvious warning sign. It will not necessarily leave a smell, visible mark or other obvious indication.

That makes testing an important starting point. Instead of judging radon risk by how a property looks or how old it is, property owners can use testing to obtain actual measurements.

It is worth keeping track of:

  • When testing was completed
  • Where the test was conducted
  • The type of test used
  • The recorded result
  • Any previous mitigation work

Having this information available can make future decisions easier.

2. Relying on a Single Test Result 

A test result provides useful information, but the circumstances surrounding the test also matter. Testing duration, placement and building conditions can all be relevant when reviewing the result.

If previous testing has been completed, keep the report rather than relying on memory. A professional can review available information and explain what further testing or assessment may be appropriate.

This can be particularly useful if the property has undergone renovations or other significant changes since the original test. 

3. Assuming Every Property Needs the Same Solution

There is no single approach that automatically suits every building.

A home’s foundation, floor construction, basement or crawl space and other structural features can influence how radon enters and moves through the property.

For this reason, a property assessment may consider:

  • Foundation construction
  • Basement or crawl space areas 
  • Floor and wall openings
  • Potential entry points
  • Existing ventilation
  • Previous testing results

Looking at these details helps keep the proposed approach specific to the property rather than based on assumptions.

4. Choosing a Mitigation System Before Understanding the Property

It can be tempting to focus on equipment first. However, the system should be considered in relation to the building and the conditions identified during assessment.

Radon mitigation generally aims to reduce the amount of radon entering or accumulating inside a building. The way this is achieved can differ from one property to another.

Before agreeing to work, ask:

  • What approach is being recommended?
  • Why is it suitable for the property?
  • Where will the system components be installed?
  • How will the system operate?
  • What follow-up is recommended?

Clear explanations can help you understand what the proposed work is intended to achieve.

5. Overlooking What Happens After Installation 

Another mistake is treating installation as the final step.

Once a mitigation system is in place, property owners should understand how it operates and what type of follow-up may be recommended. Additional testing can provide information about radon levels after mitigation.

It is also sensible to know:

  • Where the system’s main components are located
  • How to recognise potential equipment issues
  • Whether the system requires ongoing checks
  • When additional testing may be appropriate

Keeping records of testing, installation and subsequent checks can be useful for ongoing property management.

6. Choosing a Contractor Based Only on Installation

The installation itself is only one part of managing radon. The process can also involve testing, reviewing results, assessing the property, planning the work and considering what happens afterwards.

When comparing radon contractors Halifax, look for a professional who can explain the process clearly rather than simply recommending equipment.

Consider whether they can answer questions about:

  • The property’s test results
  • Potential radon entry points
  • The proposed mitigation approach
  • System operation
  • Follow-up testing
  • Ongoing maintenance

Clear communication helps property owners understand what is being recommended and why it may be appropriate for their building. 

Take a More Informed Approach to Radon

Dealing with radon does not have to mean guessing what to do next. Testing can establish useful information, while professional assessment can help property owners understand what their results mean and whether further action should be considered.

If you are looking for radon contractors Halifax, Radon Atlantic can help you navigate the process from testing and assessment through to mitigation and follow-up.

The most useful approach is a structured one: review the property’s radon results, consider its individual characteristics, ask questions about any recommended work and keep track of what happens afterwards.

Radon Mitigation System Installers | Certified Radon Solutions

Radon Mitigation System Installers: Why You Need Professionals 

Radon is one of those problems most homeowners don’t see coming. It has no smell, no colour, and no immediate warning signs. Yet it can enter homes quietly through foundations and stay trapped indoors. This is why many homeowners turn to certified radon mitigation system installers instead of DIY fixes. 

At Radon Atlantic, the approach includes testing, assessment, and long-term radon reduction based on recognized standards. A radon system only works well when it is designed for the specific home, not treated as a one-size solution.

What Is a Radon Mitigation System Designed to Do?

A radon mitigation system is built to reduce radon levels inside a home by controlling how gas enters and exits the structure.

In most cases, the system works by:

  • Drawing radon from below the foundation
  • Redirecting it through sealed piping
  • Safely venting it outside above roof level

Core components typically include:

  • PVC piping system
  • Continuous radon fan
  • Suction points in the foundation
  • Sealing of key entry locations
  • Monitoring and testing support

Every installation is based on the home’s structure, soil conditions, and measured radon levels.

Why Is Proper Assessment So Important Before Installation?

At Radon Atlantic, mitigation is always based on testing and site evaluation first. This step helps ensure the system is correctly designed for the property.

A professional assessment usually includes:

Foundation review

Technicians inspect:

  • Basement slab joints
  • Cracks and gaps
  • Sump systems
  • Crawl space areas
  • Utility penetrations

These areas are common radon entry pathways.

Radon measurement review

Existing test results are reviewed or new testing is recommended to confirm exposure levels.

Airflow and pressure evaluation

Understanding how air moves through the home helps determine the most effective system design.

Why Do DIY Radon Solutions Fall Short in Most Homes?

Some homeowners attempt sealing cracks or using basic ventilation changes. While these steps may help reduce some entry points, they may not fully address how radon moves through soil and pressure differences in many homes. 

Common limitations of DIY approaches include:

  • No engineered airflow design
  • Incorrect fan sizing or placement
  • Incomplete sealing of entry points
  • No sub-slab suction system
  • No post-installation verification testing

Without proper system design and testing, radon levels may remain higher than expected even if some improvements are visible. This is why professional installation is often recommended.

What Makes Professional Installation Different?

Certified installers typically follow a structured process based on testing and building science principles.

1. System design based on data

Each system is designed using:

  • Radon levels
  • Home layout
  • Foundation type
  • Soil conditions

2. Proper installation standards

Systems are installed to ensure:

  • Continuous operation
  • Safe exterior venting
  • Efficient sub-slab suction
  • Long-term durability

3.Verification testing

After installation, testing is performed to confirm radon reduction performance after installation.

How Long Does a Typical Installation Take?

Most residential radon mitigation systems can be installed within one day.

A standard installation process includes:

  1. Creating a suction point in the foundation
  2. Installing PVC piping system
  3. Fitting the radon fan
  4. Sealing identified entry points
  5. System testing and activation

More complex homes may require additional time depending on structure and access points.

Are Radon Mitigation Systems Noisy or Disruptive?

Modern systems are generally designed for quiet operation when installed correctly. 

Installers typically place fans in locations such as:

  • Garages
  • Exterior walls
  • Utility rooms
  • Attic spaces (where appropriate)

When properly installed, systems run continuously with minimal noise inside living areas.

What Should Homeowners Ask Before Choosing Installers?

Choosing experienced professionals is an important part of the process.

Homeowners may ask:

  • Is post-installation testing included?
  • How is the system designed for my home?
  • What standards do you follow for installation?
  • Where will the vent system exit the building?
  • Is ongoing maintenance required?

Clear answers usually reflect a more structured and professional approach.

Why Are More Homeowners Choosing Certified radon mitigation system installers Today?

Awareness of indoor air quality has increased significantly in recent years. Radon is now widely recognized as a long-term health concern when present at elevated levels.

Certified installers provide:

  • Testing-based system design
  • Professional installation methods
  • Compliance with recognized mitigation standards
  • Radon reduction results are verified through post-installation testing. 
  • Long-term system performance support 

At Radon Atlantic, the approach is focused on safe indoor environments supported by proper measurement, installation, and validation.

Key Takeaways

Radon cannot be seen or detected without proper testing, which is why professional handling is important. A mitigation system is not just equipment installation—it is a structured process based on assessment, design, and verification.

Working with experienced radon mitigation system installers helps support proper system design for the home, professional installation, and verification through testing for improved long-term system performance and indoor air quality.

Radon Testing Halifax

Radon Testing Halifax: Are You Really Safe at Home?

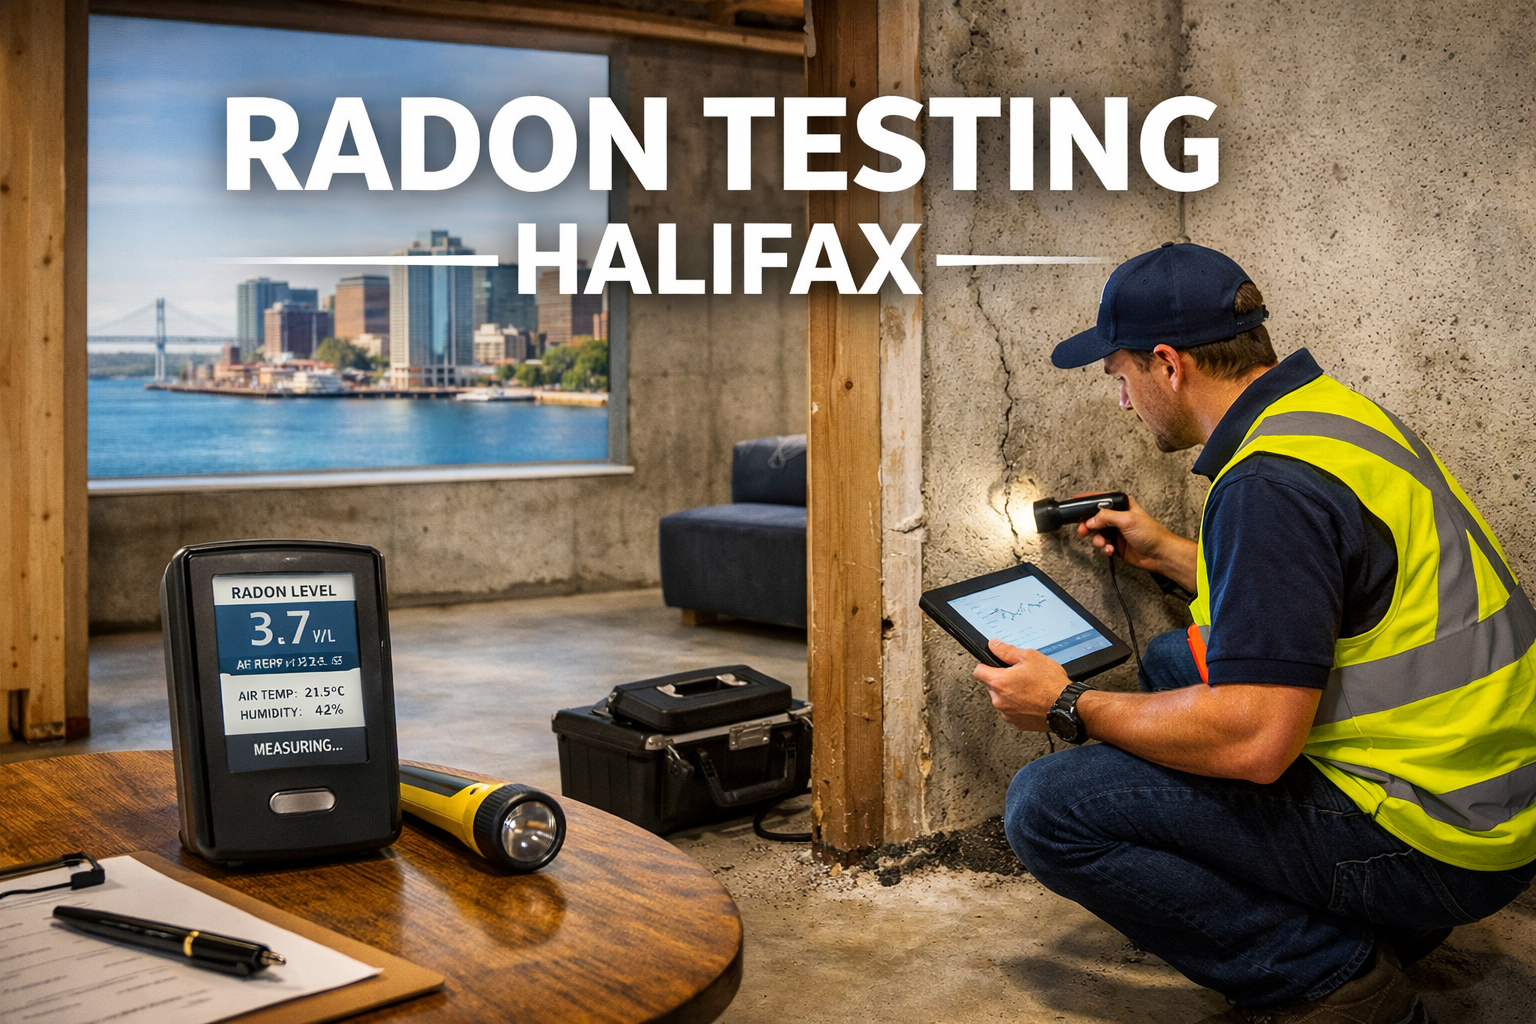
Keeping your family safe is every homeowner’s priority in Nova Scotia. While we often focus on visible concerns like fire safety or security, radon is an invisible risk that can quietly enter your home through the foundation. For residents in Halifax, professional radon testing Halifax is the most reliable way to identify this potential issue. Early detection can help you monitor and manage potential long-term health risks.

Radon has no color, smell, or taste. This makes it impossible to detect without professional-grade tools. While DIY kits may provide a rough indication, professional testing offers more reliable results, as radon levels can fluctuate with weather and ventilation.

Radon Testing Halifax

Why Radon is a Concern in Nova Scotia

Radon comes from the natural breakdown of uranium in the soil and rocks under your home. When this gas is outside, it mixes with the fresh air and stays at very low, safe levels.

The problem starts when the gas gets trapped inside a building. Because modern homes are built to keep heat in, they also tend to keep radon in. Over time, the gas can build up in basements and crawl spaces.

It is important to know that radon enters through tiny cracks in the floor, gaps around pipes, or even through small pores in concrete. Every house is different; your home might have high levels while the house next door is perfectly fine.


This is why you cannot rely on a neighbor’s results. Regular radon testing Halifax is the only way to be sure about your own property, especially if you spend a lot of time in the lower levels of your house.

The Value of a Professional Test

Professional testing typically delivers more precise results than standard store kits, thanks to certified equipment and proper placement. Here is why it matters:

  • Accuracy: Professionals use equipment that is regularly calibrated to ensure the numbers are right.
  • Placement: Detectors need to be in the right spot. If they are placed too close to a window or fan, readings may be inaccurate.
  • Detailed Reports: You don’t just get a number; you get an explanation of what that number means for your health.
  • Real Estate Confidence: If you are selling your home, a professional report from Radon Atlantic provides buyers with verified radon levels.

How the Testing Process Works

Testing for radon is a straightforward process, but it needs to be done correctly to be useful. There are a few different ways to check your home:

Short-term tests usually last between two and seven days. These are great if you are in a hurry, like when you are buying a new house and need an answer fast.

Long-term testing is usually better for homeowners. Radon levels can fluctuate with seasonal changes, such as rainfall or ground freezing. A long-term test, running 90 days or more, provides a more accurate understanding of the radon levels you are exposed to throughout the year.

When to Call for a Test

It’s recommended to schedule radon testing in Halifax, especially if:

  • You have a basement used as a bedroom or living area.
  • You have recently done renovations that might have changed the airflow in the house.
  • You are about to buy or sell a home in the Halifax area.

If a test shows that your levels are high, there are several ways to fix it. Professionals can install systems that reduce radon levels by venting it outside. When installed correctly, these systems are designed to significantly reduce radon concentrations.

Protecting Your Family Long-Term

Radon exposure is recognized by health authorities as a potential risk factor for lung cancer. Scheduling radon testing is a recommended step to help monitor and manage potential exposure. Whether you have a brand-new house or an older home, knowing your radon levels is part of being a responsible homeowner.

Call Radon Atlantic at 902 444 8724 or visit our website https://www.radonatlantic.com/ to schedule your radon testing Halifax today.

Radon Mitigation System Installers | Certified Radon Solutions

Radon Mitigation System Installers: Why You Need Professionals 

Radon is one of those problems most homeowners don’t see coming. It has no smell, no colour, and no immediate warning signs. Yet it can enter homes quietly through foundations and stay trapped indoors. This is why many homeowners turn to certified radon mitigation system installers instead of DIY fixes. 

At Radon Atlantic, the approach includes testing, assessment, and long-term radon reduction based on recognized standards. A radon system only works well when it is designed for the specific home, not treated as a one-size solution.

What Is a Radon Mitigation System Designed to Do?

A radon mitigation system is built to reduce radon levels inside a home by controlling how gas enters and exits the structure.

In most cases, the system works by:
  • Drawing radon from below the foundation
  • Redirecting it through sealed piping
  • Safely venting it outside above roof level
Core components typically include:
  • PVC piping system
  • Continuous radon fan
  • Suction points in the foundation
  • Sealing of key entry locations
  • Monitoring and testing support

Every installation is based on the home’s structure, soil conditions, and measured radon levels.

Why Is Proper Assessment So Important Before Installation?

At Radon Atlantic, mitigation is always based on testing and site evaluation first. This step helps ensure the system is correctly designed for the property.

A professional assessment usually includes:

Foundation review

Technicians inspect:
  • Basement slab joints
  • Cracks and gaps
  • Sump systems
  • Crawl space areas
  • Utility penetrations

These areas are common radon entry pathways.

Radon measurement review

Existing test results are reviewed or new testing is recommended to confirm exposure levels.

Airflow and pressure evaluation

Understanding how air moves through the home helps determine the most effective system design.

Why Do DIY Radon Solutions Fall Short in Most Homes?

Some homeowners attempt sealing cracks or using basic ventilation changes. While these steps may help reduce some entry points, they may not fully address how radon moves through soil and pressure differences in many homes. 

Common limitations of DIY approaches include:
  • No engineered airflow design
  • Incorrect fan sizing or placement
  • Incomplete sealing of entry points
  • No sub-slab suction system
  • No post-installation verification testing

Without proper system design and testing, radon levels may remain higher than expected even if some improvements are visible. This is why professional installation is often recommended.

What Makes Professional Installation Different?

Certified installers typically follow a structured process based on testing and building science principles. 

  1. System design based on data

Each system is designed using:

  • Radon levels
  • Home layout
  • Foundation type
  • Soil conditions
  1. Proper installation standards

Systems are installed to ensure:
  • Continuous operation
  • Safe exterior venting
  • Efficient sub-slab suction
  • Long-term durability
  1. Verification testing

After installation, testing is performed to confirm radon reduction performance after installation. 

How Long Does a Typical Installation Take?

Most residential radon mitigation systems can be installed within one day.

A standard installation process includes:
  1. Creating a suction point in the foundation
  2. Installing PVC piping system
  3. Fitting the radon fan
  4. Sealing identified entry points
  5. System testing and activation

More complex homes may require additional time depending on structure and access points.

Are Radon Mitigation Systems Noisy or Disruptive?

Modern systems are generally designed for quiet operation when installed correctly. 

Installers typically place fans in locations such as:

  • Garages
  • Exterior walls
  • Utility rooms
  • Attic spaces (where appropriate)

When properly installed, systems run continuously with minimal noise inside living areas.

What Should Homeowners Ask Before Choosing Installers?

Choosing experienced professionals is an important part of the process.

Homeowners may ask:
  • Is post-installation testing included?
  • How is the system designed for my home?
  • What standards do you follow for installation?
  • Where will the vent system exit the building?
  • Is ongoing maintenance required?

Clear answers usually reflect a more structured and professional approach.

Why Are More Homeowners Choosing Certified radon mitigation system installers Today?

Awareness of indoor air quality has increased significantly in recent years. Radon is now widely recognized as a long-term health concern when present at elevated levels.

Certified installers provide:
  • Testing-based system design
  • Professional installation methods
  • Compliance with recognized mitigation standards
  • Radon reduction results are verified through post-installation testing. 
  • Long-term system performance support 

At Radon Atlantic, the approach is focused on safe indoor environments supported by proper measurement, installation, and validation.

Key Takeaways

Radon cannot be seen or detected without proper testing, which is why professional handling is important. A mitigation system is not just equipment installation—it is a structured process based on assessment, design, and verification.

Working with experienced radon mitigation system installers helps support proper system design for the home, professional installation, and verification through testing for improved long-term system performance and indoor air quality.